

Capturing the peak essence of summer is a culinary joy that transforms your kitchen into a sanctuary of fresh flavor. When your garden beds or local farmers’ market stalls are bursting with plump, sun-ripened beauties, it is the perfect moment to preserve that botanical magic. 🌿
Home food preservation allows you to bottle the vibrant taste of fresh produce without any artificial additives or strange preservatives. By mastering this simple water bath method, you will stock your pantry with gorgeous jars of ruby-red goodness ready to brighten up cold winter nights. 🍅
Whether you are tending a backyard garden or simply love the taste of peak-season produce, this easy guide will walk you through the entire process step by step. Let us celebrate the harvest and cultivate a deeper connection to our food with this rewarding kitchen project. ✨
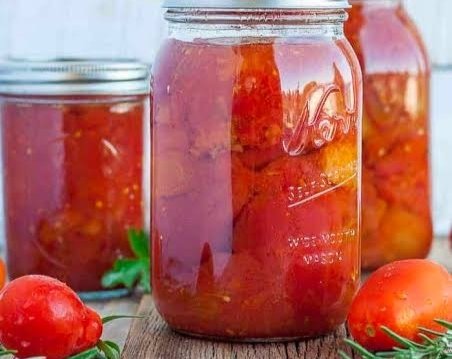
45 minutes
45 minutes
1 hour 30 minutes
Makes 4 quart jars
Ingredients
- 12 pounds fresh, ripe tomatoes (such as Roma, Plum, or Beefsteak)
- 4 tablespoons bottled lemon juice (1 tablespoon per quart jar)
- 2 teaspoons canning salt (optional, 1/2 teaspoon per quart jar)
- Boiling water or hot tomato juice to pack the jars
Shopping List
- Produce: 12 pounds fresh, ripe tomatoes (Roma or Plum work best)
- Pantry: 1 bottle of bottled lemon juice (do not use fresh juice to ensure consistent acidity)
- Pantry: 1 container of canning or kosher salt (non-iodized)
Equipment Needed
- Water bath canner or large, deep stockpot with a rack
- 4 quart-sized glass canning jars with lids and bands
- Jar lifter and bubble remover tool
- Large pot for blanching
- Large bowl filled with ice water
- Sharp paring knife and cutting board
- Ladle and canning funnel
Helpful Tips
- Standardized acidity is non-negotiable for safety: Always use bottled lemon juice instead of fresh squeezed. The acidity level of fresh lemons fluctuates naturally, whereas bottled juice has a guaranteed pH level, ensuring your tomatoes remain safely preserved.
- Opt for meaty, low-moisture varieties: Cultivars like Roma, San Marzano, or Plum tomatoes are highly recommended because they possess thicker walls, fewer seeds, and less water, resulting in a much richer yield.
- Strict quality control: Carefully inspect each fruit and discard any tomatoes with soft spots, cracks, mold, or signs of decay. Utilizing compromised produce can spoil the entire batch and lower the acid levels dangerously.
- Incorporate subtle botanicals: Feel free to tuck a single fresh basil leaf or a whole peeled garlic clove into the bottom of each jar before packing. Keep these additions minimal to maintain the proper safety equilibrium.
Step-by-Step Instructions
- Prepare your canning equipment: Wash jars, lids, and bands in hot, soapy water. Place the clean jars in your water bath canner, fill with water, and bring to a simmer to keep them warm until ready to use.
- Blanch and peel the tomatoes: Bring a large pot of water to a rolling boil. Wash the tomatoes and cut a small, shallow ‘X’ on the bottom of each one. Dip the tomatoes into the boiling water for 30 to 60 seconds until the skins begin to split, then immediately transfer them to a bowl of ice water.
- Remove skins and cores: Slip the skins off the cooled tomatoes using your fingers or a paring knife. Cut out the tough core at the stem end, and leave the tomatoes whole or cut them into halves or quarters.
- Acidify the jars: Carefully remove the warm jars from the canner. Add 1 tablespoon of bottled lemon juice and 1/2 teaspoon of canning salt (if using) to the bottom of each quart jar.
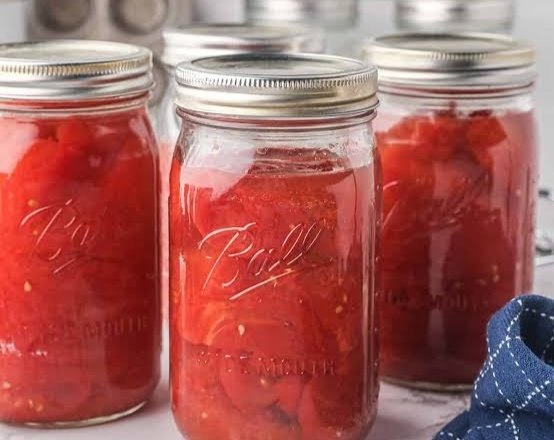
- Pack the jars: Pack the peeled tomatoes tightly into the prepared jars, leaving about 1/2 inch of headspace at the top. Press down gently on the tomatoes to release their natural juices and fill empty spaces. If necessary, top off with boiling water or hot tomato juice, maintaining the 1/2-inch headspace.
- Remove air bubbles and seal: Slide a clean bubble remover tool or plastic spatula down the inside of each jar to release any trapped air. Wipe the rims of the jars clean with a damp paper towel. Center the lids on the jars and screw the bands on until they are fingertip-tight.
- Process the jars: Lower the filled jars back into the water bath canner, ensuring they are covered by at least 1 to 2 inches of water. Cover the pot, bring the water to a rolling boil, and process for 45 minutes (adjusting for altitude if necessary).
- Cool and store: Turn off the heat and let the jars sit in the hot water for 5 minutes. Use a jar lifter to carefully remove the jars and place them upright on a towel-lined countertop. Let them cool undisturbed for 12 to 24 hours. Check the seals by pressing the center of each lid—if it does not flex, your jars are successfully sealed!
Variations & Serving Ideas
These preserved jewels are incredibly versatile, ready to elevate everything from slow-simmered marinara sauces to rustic winter stews and comforting chilis. For a beautiful artisanal touch in your pantry, tie a piece of natural jute twine around the jar neck and add a handwritten label detailing the harvest date. Once unsealed, transfer any unused portions to an airtight container, store in the refrigerator, and enjoy within 3 to 5 days.
Preserving the season’s finest flavors is a beautiful way to connect with your food and nurture your kitchen. I would love to hear how your canning journey unfolds, so please share your thoughts and questions in the comments section below!